Thursday, December 30, 2010

Layout Part IV - Templot and painting

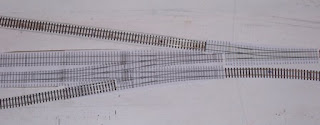
Since the cricket was a debacle and since child number 4 is still coming (due 16/12 so a bit like the LNER - Late Never Early) I got stuck in and painted the track which I had completed (well most of it - the bits at the end of the loop haven't been done) and added droppers, and glued it down with PVA as seen in the pictures attached.  I have also purchased Templot - thanks to Geoff J who sent me some shots of what he had done, it tipped me over the edge and given the strength of the A$ v the Euro, Pound and US$ it was a steal! - and drew up the loop and associated points to get a better feel for how it will look - and I was able to check clearances too.
 Photo 1 shows the RH point heading to the platform, the bottom LH point having the road to the cattle dock heading from the toe (thanks to the couple of people who suggested swapping the cattle and the coal so the livestock was further from the platform!) and the arrival end of the loop.  The gap in the point work is because I printed the RH point later. 

These two photos show the layout from a birds eye view.  Mr Shop 1 tells me the missing bits were posted from the snow bound UK - which means having gotten thought Heathrow (!) they are probably flood bound somewhere in Queensland.  For those who haven't heard, an area the size of France and Germany combined is currently under water here - fortunately the only things affected for me are mail, and groceries however our own river managed to get to Minor Flood level this evening - it won't affect us in town I think.

As this is likely to be the last post for 2010 (Baby 4 is being given the hurry up tomorrow morning so I don't think the Friday Night Update will be happening!) I would like to wish all who read a Happy and Safe 2011.

Monday, December 27, 2010

Oxford Diecast Horsebox

Amongst the various bits and pieces I received for Christmas was three models from Oxford Diecast which were given to me by my parents.  One of the three was the Southern Railway liveried horsebox and as it happened a couple of days before Christmas the December/January Magazine from the 2mm Association arrived.  This contained an article by Matthew Wald in which he explained how he had modified the Oxford offerings of both the mechanical horse and horsebox in LNER livery for Copenhagen Fields.  Given that I didn't really have a need for a SR liveried horsebox (an LMS one now...) I thought it would make a good guinea pig to try out what Matthew did for myself.


The first thing to do was to take the horsebox out of its box and dis-assemble it.  Like Matthew I found the glazing didn't want to come out neatly and so it is the pile on the right hand side.  Apologies for the poor quality of the photo below but I had finished the project before I looked at the photos on the computer or I would have taken a better one.  For the benefit of readers who aren't members of the 2mm Association, the wheels need to be cut out of the chassis.  For the steering axle at the front, this I found was easiest by folding the seats forward and nicking the two bits of plastic holding the axle in.  For the 4 wheel driving axle, this was removed by slicing from below.


The main surgery is in shortening the axles.  For the fore axles I cut in half and then filed down the ends.  I also filed the chassis a bit, offering the whole up to the body until I was satisfied the wheels were now sitting in the wheel arches, and not protruding.  The aft axle I was able to take the wheels off, file the wheels down at the back, drill the hole a bit deeper and reassemble it all.  Again, offer it up to the body in the chassis until satisfied with the fit.


Once happy with the axles, reassemble it all and glue the wheels in.  The photo below shows the SR one next to an unmodified BR liveried horsebox.  It shows the changes to the wheels very clearly and demonstrates why it is worth the time.  Speaking of time, this was the work of the lunch break during Day 1 of the Boxing Day Test - and a Test which wasn't worth watching if an Australian supporter!


Matthew filed clear plastic to fit for the windows.  I used Microscale Krytal Klear.  The side windows were straight forward but after a couple of goes with the windscreen and not being happy with it, I eventually filed around the original and stuck it in place with the Krystal Klear.  Prior to doing the windows, the body was painted with Humbrol 49 - Matt Varnish.  Any similar product will do the trick and the timing in the process is arbitrary.  It certainly helps to take the "toy" out of the model.  I plan on giving mine a light weathering too.


So the finished model.  Remember that at NVD the windscreen looks a lot better.  It wasn't until I was looking at the photos that I noticed the fogginess.  Having done this, I plan on doing the BR one to match and then looking at the other Oxford offerings to see what can be done - perhaps wing mirrors?  I haven't found a good enough photo to see the position yet!


Friday, December 24, 2010

Merry Christmas

Since it is Christmas Eve, and there is a lull between chores in preparing for tomorrow (bearing in mind I have 3 daughters under 5 - and still waiting for the baby which was due on the 16th!), I thought I would take this opportunity to wish all those who have been reading about my adventures a Merry Christmas.  Thank you to all who have commented either on the blog itself or via email, answering questions and offering advice and encouragement.  I haven't done what I had planned to do this year (i.e. Elm Road) but I am very satisfied with what has been done - and looking forward to sharing my continuing adventures with both N gauge and 2mm FS in 2011.  I hope Christmas time brings joy and happiness - and something railway related in the assorted gifts and goodies.

Merry Christmas everyone!

Wednesday, December 22, 2010

Layout Part III - It lives (sort of)

Having almost run out of chair plates for track building and being a little bit impatient (normally by now a layout of mine would have had something running on it!) I nicked the DD's controller and hard wired it to the platform road.  The above (poor) footage is of Mavis going for a run.  Previously I had a go with the only J70 I have built together with the W&U 4 wheel tram which were built back in March (no progress since - waiting for bits and organisation!) as I figured the only 2mm loco I had should get a go.  Unfortunately the footage of that was worse than this so this will have to do.

Saturday, December 18, 2010

Layout Part II - Swallow's End Track Plan

The layout now has a name - thanks to all who provided advice, suggestions and pointed out where some of the suggestions had previously been used.  Given that the previous layout built here in Longreach was named Swallow Street (after the street where we live - and based on a track plan called Collier Street, Amity's maiden name) we decided this terminus should continue the theme and so Swallow's End.

Swallow's End is a quiet little village "somewhere in England".  If it were GWR territory it would be yellow/blue code (I am not too up with the GWR colour coding but the 57xx in the Haresnape book I have are marked thus).  I guess this gives a nominal axle load of around 18T for locomotives so I will work with that.

I have also negotiated a small extension.  Instead of having cassette operation, I am going to build traverser tray which will hold the trains and be separate to the main board (bolted on for operation).  This in effect will mean the previous entry/exit line will be moved 15 inches to the end of the board.  At this stage I don't plan on changing the track plan by adding more space in the loop but I could - this will mean there is a bit more room for the points but the traverser will be fixed at a 0-6-0T, 7x 10' wagons and a 15' brake.

The signals are marked where I think they should be - as there is the possibility of a passenger train being locked in the platform while a freight comes in (or vice versa) I am assuming block control.  Obviously, should such a branch stub survive Beeching, it may well have become a one engine in steam and eventually just the platform if close enough to a major urban centre to provide suburban traffic (similar to how St Alban's Abbey is now).  With the extension, the home signals can be included rather than just the pair of starters.  The positioning of the home signals provides the limit of shunt as well.

Friday, December 17, 2010

Friday Night Update - 17 December

Just a quick update - I spent the evening making track for the still un-named layout (thanks to the 2mmVAG members who have supplied a very long list of suggestions.   Management is looking into it and also consulting here the Gazetteer of British Place Names to see what can be made of it all).  I was very pleased to have made a scale 240 feet in just a tick under 60 mins.  I guess it helped having the lengths of rail pre-cut and the chairs pre-tinned (these were done a couple of nights ago when I had made too many joint errors and decided to just do simple stuff for the last half hour!) but still, to get a length done and out of the jig in less than 15 mins was a triumph for me!  I also got the 4th buffer stop done and worked out how many full 60' lengths I still need (7) and then check to see how many sets of chair plates I still had (6 - naturally!).  Two steps forward, one back...  Shop 1 has the order (I hope) and so once the snow and ice clears and it makes its way here, progress shall continue (although I will do the last 6 lengths and start painting sleepers and what not).

Thursday, December 16, 2010

DCC conversion

I had a go at converting a loco to DCC last night.  In this case, I started small converting my model of 45 114 following the pretty straightforward explanation (with pictures - I like pictures!) found here Farish Diesel DCC Fitting.  I had to remove quite a chunk of the metal from the end with the chip and socket (I decided to put the socket in so I can put a blanking plug in to run on DC - it also meant if I did any dodgy soldering, I wouldn't be damaging a chip) and it still isn't fitting quite right so I will probably have to unsolder it all, pull the whole loco apart and remove some more metal.  The blog which I followed suggested a milling machine would be best but I found using a file just as good - if a bit time consuming.  The best part was, having put it all together it worked - and has been programmed using my NCE ProCab.   So now to the next - a Class 33.  The grand plan is to do all the blue diesels in DCC and having done this one, it should be a doddle - although I will have to work up to the 03, 04, 08 and 14 I think.
 
 
EDIT - a couple of hours later and I have removed some more of the metal under the chip and it all fits perfectly.  I had to sacrifice the cab moulding at that end, but I am thinking of detailing the buffer beam at the other end in any case so the end with the cab in it will be leading.  It isn't noticeable unless you look, but knowing it is missing, I will see it every time that end leads if I don't make it a one way loco.  Not sure what train it will get - possibly a Freightliner container set when I get around to sorting the collection I got on eBay a couple of months back.

Wednesday, December 15, 2010

Deltic Downunder

Blogger has enabled the upload of video and I thought my most recent arrival would make a good test subject (sorry for the poor quality - I will see if I can do a better job and edit it later).  This is Deltic, still running in.  I didn't realise it came with directional lights (probably should have since this seems to be standard on all new diesels these days) and to be honest, I am a little bit disappointed.  I don't know that it will be operational with no train all that often so the red will have to go.  The white is quite bright and there will need to be something done to remove the inner glow in front of the cab.  At the slowest speed I could run it at on pure DC the lights were out.  Once it has run in for the hour each way, and I have checked the lubrication, I will stick a chip in it and see how slow it will go on DCC.

As one of those "it doesn't really fit my plans but gee whiz" locos I am very pleased with it.  I do model LMR so it is appropriate (which tends to boggle the mind a little as I always associated Deltics with the ECML) and I have seen the real beast so it was snapped up when it was announced.  And here for Christmas too.

Saturday, December 11, 2010

Track once more

I spent the evening making a start on the track for the Un-named Layout.  So far I have about a metre (3 feet 3 inches for those who don't understand metric!) done which comprises most of the road into the platform.  This has been done as one continuous piece - a little bit fragile as far as moving it about goes but since it will form an electrical block, it seems like a good idea.  I have built a LMS/BR (1-070 for the 2mm SA members reading) as shown below - it has a sleeper instead of the metal cross piece which solves the electrical break issue.
The eagle eyed will notice that the bit of track from the leading wheel of the 57xx to the buffers doesn't have chair plates while the rest does.  This is because the bit which ended up getting the buffers was the first of the trial pieces of track I built following fettling of the original jig I was sent - I couldn't see any good reason not to used it (and I had to shorten it as it happens to fit) and putting the buffers on it seemed like a good solution.  After all, the loco really shouldn't be getting too much closer than this now should it?

Friday, December 10, 2010

Layout Part I

I had a very busy day today.  I finally added a ply top to the aluminum frame which my parents brought up to me in June.  The ply came from school - I had my eye on the off cut bit for a while but had to wait until the end of term to "obtain" it from the scrap bin.  So it came home last week and today permission was granted to fit the bits together. 

So having drilled and riveted it all together (for those counting rivets there were 26), it received a coat of undercoat and this evening, rather than hitting the work bench, I spent a couple of hours drawing, erasing, redrawing, swearing, cleaning the whole board and starting again until I got something which feels prototypical, has operational interest and while challenging, won't put me off.

The baseboard measures a little under 2 meters long by 10 inches wide.  I know this is mixing measurements but that is what you get for a layout which is 2mm to the foot!!  I have allowed 400mm for cassettes - this holds a Class 73, 5 of the new Farish 5 plank wagons and a new Farish LMS Brakevan.  It also easily holds a 57xx and B Set.

Entry is between some trees and past the headshunt/coal merchants siding.  Straight on takes you to the yard, the platform road deviates to the back (I am not planning on a backscene but Amity says there must be a front and a back or she will get confused.  The Cassette Bay is on the RH end for the purposes of this exercise).  The platform doesn't have run around facilities - trains requiring same will have to set back to the trees, head into the yard, perform the run around and then head back to the platform.   Adds to the operational interest.

The yard is fairly basic - goods shed, cattle dock, crane and coal merchant.  The crane will probably be on the cattle line separate to the goods shed.  While the layout is neat and orderly it is a bit cramped and this will mean somewhere else to drop a wagon. 

The captions hopefully will give you a fairly good idea.  Now that I have a track plan in 1:1 scale (relatively speaking!) I will draw it up tomorrow and post.


 Photo 1 - looking over the coal merchant/head shunt towards the trees which will hide the entry/exit.

 Photo 2 - The 57xx and B Set are in the platform road.  The 882xxx is in the arrival/departure road in the yard.  Scalescenes free goods shed making up the feel to the left.

 Photo 3 - taken from the cassette bay end looking towards the buffer stops in the distance.

 Photo 4 - Railways from the Air!  The bottom track is the cattle dock's location.  The length of track next to the 5 plank wagons is roughly the distance between the points on the run around section.

 Photo 5 - another shot of the entry/exit end of the layout.

Photo 6 - the whole lot.  The line marking the entry/exit can just be seen to the right of the trees.

So far (assuming you, the reader, have gotten this far!) the layout doesn't have a name.  Amity suggested Shortreach or Thompson Sidings as having links to where we live (the river is the Thompson - and the town is built on the long reach of said river...).  My current favourite is Coruscant - although it isn't built up enough.  Suggestions would be welcome - living so far from the UK we don't have a good handle on place names.  Just a word of caution - we are looking for something generic.  This layout will have LBSCR Terriers, LNWR Coal Tanks, 57xx's, Class 14's and LNER J70's running on it from time to time (although with only two trains fitting there is no chance (ha ha) of all these happening at once) so a name which screams West Country or Black Country or Wales or Scotland won't help.

Wednesday, December 8, 2010

School's out for summer...

I started my 7 week annual summer holiday at COB last Friday.  Since then I have managed to get quite a bit of time at the Workbench (thanks to an understanding wife and 2 well trained daughters.  D3 (who isn't yet 2 years old) isn't quite as well trained and tipped the gluey water mix I use for transfers over me, the floor and the table today, but no serious damage done.  Training has been intensified in this respect!

So what have I done you ask?  Well today was a day of transfers...
The top three rows of wagons (and loads) were done today, in and around entertaining D2 from time to time. 

Starting at the top - NGS Kit 18 - LMS Van Twin Pack.  These have been lettered and numbered using the Modelmaster transfers found in MMT073 (for the fitted - with BR numbers) and MMT571 (for the unfitted in LMS livery).  Second row is 4x NGS Kit 3.  These have been done in LMS livery using numbers and tare weights from MMT571 and letters from MMT576.  The third row of Peco Conflat A kits has been done using MMT570.

The bottom row is part of what I have been doing the last couple of days.  As mentioned in my previous post, I was in the process of doing a Chivers Finelines LNER D5 Horsebox in LNER Painted Teak.  This is now at the stage of needing a couple of small corrections to the paint job and then transfers.  In looking up details, I discovered that my original livery was wrong in a couple of places - firstly I didn't have black ends and secondly, the solebars were painted teak to match the body - something which I hadn't done either.  These have both been fixed.  I glazed the model using Microscale Kristal Klear and then painted the WC windows white from the inside.  Naturally, I learnt about the WC after I fixed the roofs but they were persuaded to part company with the bodies with a minimum of fuss and no damage so all fixed.  Just left to transfer these up.  I am considering raiding the transfers from the NGS Mk 1 Horsebox kit - certainly one of the lines of lettering saying "Return to Leyburn" will probably get a run as Leyburn is the subject of a layout being constructed in South East Queensland.

Additionally I glazed one side of the Ultima SR BG kit which started the trend into brass kits - see along time back in the blog for details of this vehicle! - and I have been working on two Ultima LMS 42' CCT's which hopefully will be finished off by the weekend.  They are at the stage of needing their transfers done.  One of these kits was purchased at the 2mm SA Expo at Huddersfield in 2000 - so a long time getting out of the UFO pile!  Back then it was 15 quid - I still have the box I purchased it in.  The second one was purchased this year - for 15 quid!  Inflation in Model Railways??  Sez who!

Monday, December 6, 2010

LNER D5 Horsebox

Some time back I managed to get via eBay 3 more Chivers LNER D5 Horsebox kits.  The one shown above is being finished in LNER "Teak" Brown paint - the other two are joining the original one I had in BR Crimson.

The brown is Precision Paints P60 - I don't think this would work for actual teak stock (so it won't be used in the NGS D113 BG kit which I would like to do in teak) but seems to be pretty good for the NPCCS stuff which was painted.

In other news I made a start on painting the LNWR Brake 3rd but painting the LNWR livery is proving to be a slow and frustrating process.  I did take a photo but won't be sharing!  I thought I had done a better job than the photo showed - and probably from NVD I did, but the enlargements is what you see here on the blog so I can't hide.  Ignorance is bliss they say and now that I am not as ignorant as I was last night, I will do some remedial work before showing it off.