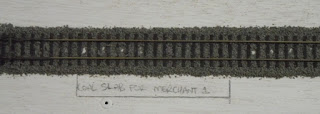
Given that most people loath this chore - and it is something which, in the past, I have found difficult to get "right" - I thought I would share my technique which I have developed while ballasting Swallow's End. Regular readers will know I am deviating from my normal method with SE and ballasting before the rest of the scenery rather than after. The first efforts were done with Amity's help a couple of weeks ago and resulted in the ballast shown in the first picture.
This was done in what I would describe as my tried and true method. Ballast was put on dry and then teased into place with a brush, before being wetted then glued down with the good old PVA/water/detergent mix. Wait for it to dry then tidy up the bits which didn't work properly. The big "disappointment" (which it isn't really) is the lack of neatness in the edges. So what to do?
The main thing I was looking for was the neat edge, which while not especially common in the post 1950's era was still around at terminus stations on quiet branches up until the Beeching Axe fell, mostly because the staff had little to do but keep the place neat and tidy. My original plan had called for the track to be laid on double sided tape, then ballasted and once the surplus was removed, the PVA/H2O mix applied to set it all in place. This, in practice, didn't work with the DS tape I tried and, with limited options here in Longreach, I had resigned myself to gluing the track down followed by the tedium of ballasting as described.
I thought about what sort of look I was seeking and read some comments about putting a strip of glue down and applying ballast to this to make an edge while ballasting Peco track - which obviously needs a lot more ballast than 2mm on PCB sleepers. I thought this would work in 2mm and thought I would give it ago using thin DS tape to make uniform edges.
This photo shows what I was aiming for and I am well pleased. So, having achieved it, I thought I should take some photos of the process.
Step one - stick the DS tape on the outside of the sleepers. In this case it is 3mm wide DS tape and, while I am not sure if it is right, it looks right to me so by virtue of Rule 1, that is what I have!!
Step two - expose the upper sticky side (and in my case I cut away from where the cattle dock is going) and then sprinkle on the ballast. As previously mentioned it is the Woodland Sceneics variety. Can't remember which type - search back though the blog to find it.
Step three - using your wife's eyelash brush (with permission - in my case Amity volunteered it at the original ballasting session) arrange the ballast as neatly as possible. Be warned, too much pressure on the bristles of the brush and you may have to start again. How do I know this????
Step four - using a NEW fine tipped brush (new works better cause the bristles aren't hard) do the final detailing bits.
Step five - using a fine atomiser (again, if you are lucky like me, your wife will donate one from her stash of "stuff". This one is particularly good.) wet the track. I use window cleaner in my water as the tension release agent as it doesn't sud up.
Step six - Apply the PVA/H2O mix. I use a surplus Children's Panadol syringe. If you have enough children you have plenty of these around! Make sure you keep it with your ballasting kit and don't use it on the kids!
Once applied it should look something like this. I went along and did some further touch ups with a cocktail stick and the end of my metal straight edge to ensure things were no going to set in the wrong spot.
And the finished product. Now to build the cattle dock. Missy (aka Julia Adams) has provided the inspiration and I plan on nicking her design. More to follow - but when I went looking for the parts earlier this evening I discovered a blown bulb in the store room and I have put off finding a new bulb until tomorrow.


